Introduction to the PHP Installation and Configuration in Termux.
Introduction to the PHP Installation and Configuration in Termux.
In today’s world, PHP is one of the most popular scripting languages used to create dynamic webpages and applications. If you are looking for PHP Installation and Configuration in Termux, this guide will provide a step-by-step guide on how to do just that.
This guide will cover everything from the initial installation to the configuration of the various components of PHP in Termux.
What is PHP?
PHP is a server side scripting language. that is used to develop Dynamic websites or Web applications. PHP stands for Hypertext Pre-processor, its earlier name was Personal Home Pages.
PHP scripts can only be interpreted on a server that has PHP installed.
The client computers accessing only the outputs of PHP Scripts generated by PHP Handler on the Server.
A PHP file contains PHP statements within PHP tag <?php … ?> and ends with the extension “.php”.
<?php
   /*
      PHP Code.....
   */
?>
How to install PHP and configure on Android?
Before starting the installation process, it’s important to ensure that you have the latest version of the Termux app installed.
Termux is the Linux Terminal Emulator for Android and we can install PHP in Termux just like other packages.
So first thing is first, you need to install Termux App on your Android Device.
Download Termux from this link.
After Termux is ready to use Update the Repositary by running the command :
~ $ pkg upd
Now install php :
~ $ pkg i php -y
Here i is the short form of install and -y option will install the PHP without asking ‘Do you want to continue? [Y/n]’
These commands will download and install latest version of PHP in Termux.
PHP Version Check
After installing PHP in Termux you can check its version to make sure PHP is installed or not.
~ $ php -v

Helloworld Program In PHP
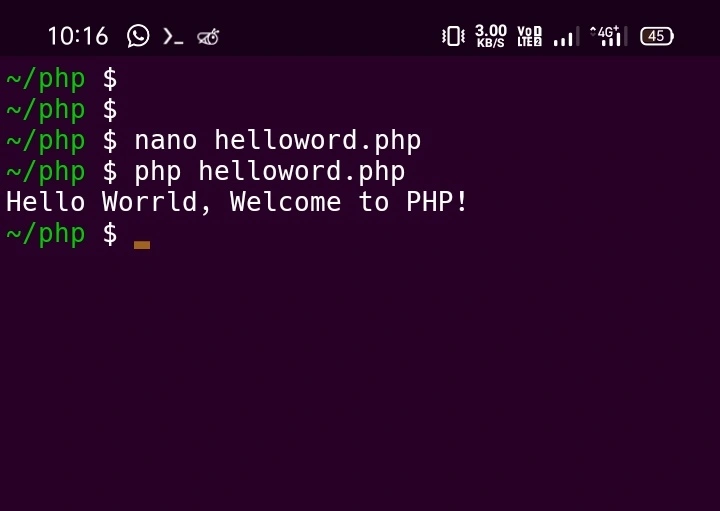
Now let’s create helloworld.php file and run it.
We will use nano Text Editor to create and write Helloworld.php file.
~ $ nano helloworld.php
Now write the helloworld script in the file and press CTRL + S to save and CTRL + X to exit nano text editor.
<php
    echo "Hello Worrld, Welcome to PHP!\n";
?>

Test your first PHP script by running :
~ $ php helloworld.php
Hello Worrld, Welcome to PHP!
~ $

Built-in PHP Development Server
The built-in PHP development server is a simple web server and router script written in PHP. It is provided as a utility to facilitate application development and can also be used to serve static files, if necessary. It is available in PHP version 5.4.0 and later and can be used to serve any PHP application.
The main purpose of the server is to make it easy for developers to test and debug their PHP applications without having to set up a full web server like Apache or Nginx.
In termux we can start php built-in development server by passing -S option and required arguments so we will be able to see output in web browser.
Syntex
php <-S HOST:PORT> [-t PATH - optional)]
Example
If you want to start php built-in development server to test your project, and the project directory is ~/PHP_Project then run this command.
~$ php -S localhost:8080 -t ~/PHP_Project
Alternatively cd can first change to PHP_Project directory and run the command without passing -t option and its value.
~ $ cd PHP_Project
~/PHP_Project $ php -S localhost:8080
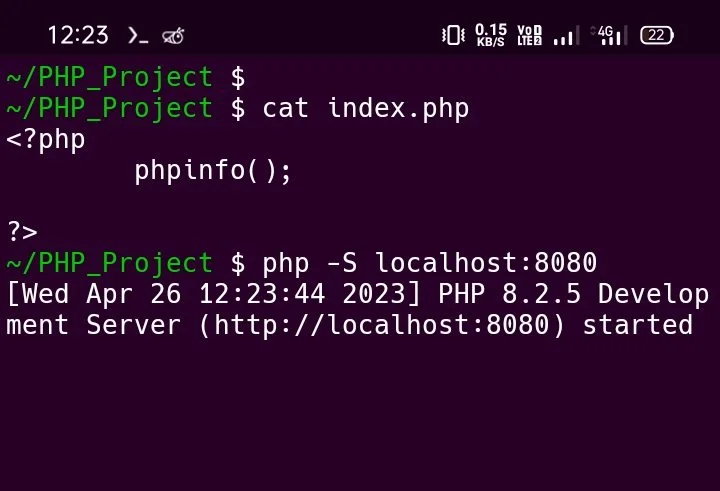
Let’s create index.php file and call phpinfo() :
~ $ nano index.php
Write following code and save. CTRL + S and CTRL + X.
<?php
    phpinfo();
?>
Now let’s start php in-built server :
~/PHP_Project $ php -S localhost:8080
[Wed Apr 26 12:23:44 2023] PHP 8.2.5 Development Server (http://localhost:8080) started

As you see Development Server is started you can open the link in web browser.
Let’s see how to open links in web browser from termux.
Long press on Termux Screen and tap on more… option.

Select the Select URL option.

Long press on the URL to open link in Web Browser.

If chrome web browser or any other.

The link will open in your Web Browser.

PHP Information
In above example we have used phpinfo() function in the index.pbp file. That is the inbuilt function of PHP which generates the information of the PHP related configuration including version the installed modules, server information and environment (if applicable) and various other details related to the PHP.
It displays all the information about installed version, server architecture, paths and values for predefined constants and otherwise. This information is useful during development and debugging.
Additionally we can get the same information on the terminal console by using php -i command.
~ $ php -i

PHP Configuration
php.ini is a configuration file used by the PHP interpreter. It is used to customize PHP’s behavior, such as the extensions and modules that are available and the values of PHP directives. It also defines the default values for PHP configuration options.
php –ini is used to check configuration files and path.
~ $ php --ini
Configuration File (php.ini) Path: /data/data/com.termux/files/usr/lib
Loaded Configuration File:         (none)
Scan for additional .ini files in: (none)
Additional .ini files parsed:      (none)

~ $
As we can see the Configuration File(php.ini) Path is data/data/com.termux/files/usr/lib.
By default the php.ini file does not exist so we have to create it in termux. But first let’s chech one of the default configuration memory_limit then we configure it and check it again.
~ $ php -i | grep memory_limit
memory_limit => 128M => 128M

~ $
Now let’s create /data/data/com.termux/files/usr/lib/php.ini file and write memory_limit = 512M
~ $ cd $PREFIX/lib
~/usr/lib $ echo "memory_limit = 512M" > php.ini
~/usr/lib $ cat php.ini
memory_limit = 512M

~/usr/lib $
After that check again.
~/usr/lib $ php -i | grep memory_limit
memory_limit => 512M => 512M

~/usr/lib $

~/usr/lib $ pwd
/data/data/com.termux/files/home/usr/lib
~/usr/lib $
~/usr/lib $
~/usr/lib $ php -i | grep memory_limit
memory_limit => 128M => 128M
~/usr/lib $
~/usr/lib $
~/usr/lib $ echo "memory_limit = 512M" > php.ini
~/usr/lib $
~/usr/lib $
~/usr/lib $ cat php.ini
memory_limit = 512M
~/usr/lib $
~/usr/lib $
~/usr/lib $ php -i | grep memory_limit
memory_limit => 512M => 512M
~/usr/lib $


